- SonarQube部署
- 预备知识
- 仓库设置
- 添加choerodon chart仓库并同步
- 部署SonarQube
- 验证部署
- 配置 Choerodon 认证
- 添加Choerodon Client
- 配置用户权限
- 配置认证插件
SonarQube部署
SonarQube并非猪齿鱼运行必要基础组件,你可以选择性进行安装。
预备知识
如果你不知道SonarQube是做什么的,那么请参考下面链接(包括但不限于)进行学习:
- SonarQube
仓库设置
添加choerodon chart仓库并同步
helm repo add c7n https://openchart.choerodon.com.cn/choerodon/c7n/helm repo update
部署SonarQube
注意:本事例中 PostgreSql 数据库搭建仅为快速体验 SonarQube 而编写,由于使用了NFS存储故并不能保证其稳定运行或数据不丢失,您可以参照 PostgreSql 官网进行搭建。
helm install c7n/sonarqube \--set persistence.enabled=true \--set persistence.storageClass=nfs-provisioner \--set postgresql.persistence.storageClass=nfs-provisioner \--set ingress.enabled=true \--set ingress.'hosts[0]'=sonarqube.example.choerodon.io \--set plugins.'install[0]'=https://file.choerodon.com.cn/choerodon-install/sonarqube/sonar-auth-choerodonoauth-plugin-1.0-RELEASE.jar \--set plugins.'install[1]'=https://github.com/gabrie-allaigre/sonar-gitlab-plugin/releases/download/4.0.0/sonar-gitlab-plugin-4.0.0.jar \--version 0.15.0 \--name sonarqube \--namespace c7n-system
- 更多参数及含义请参考SonarQube Chart
验证部署
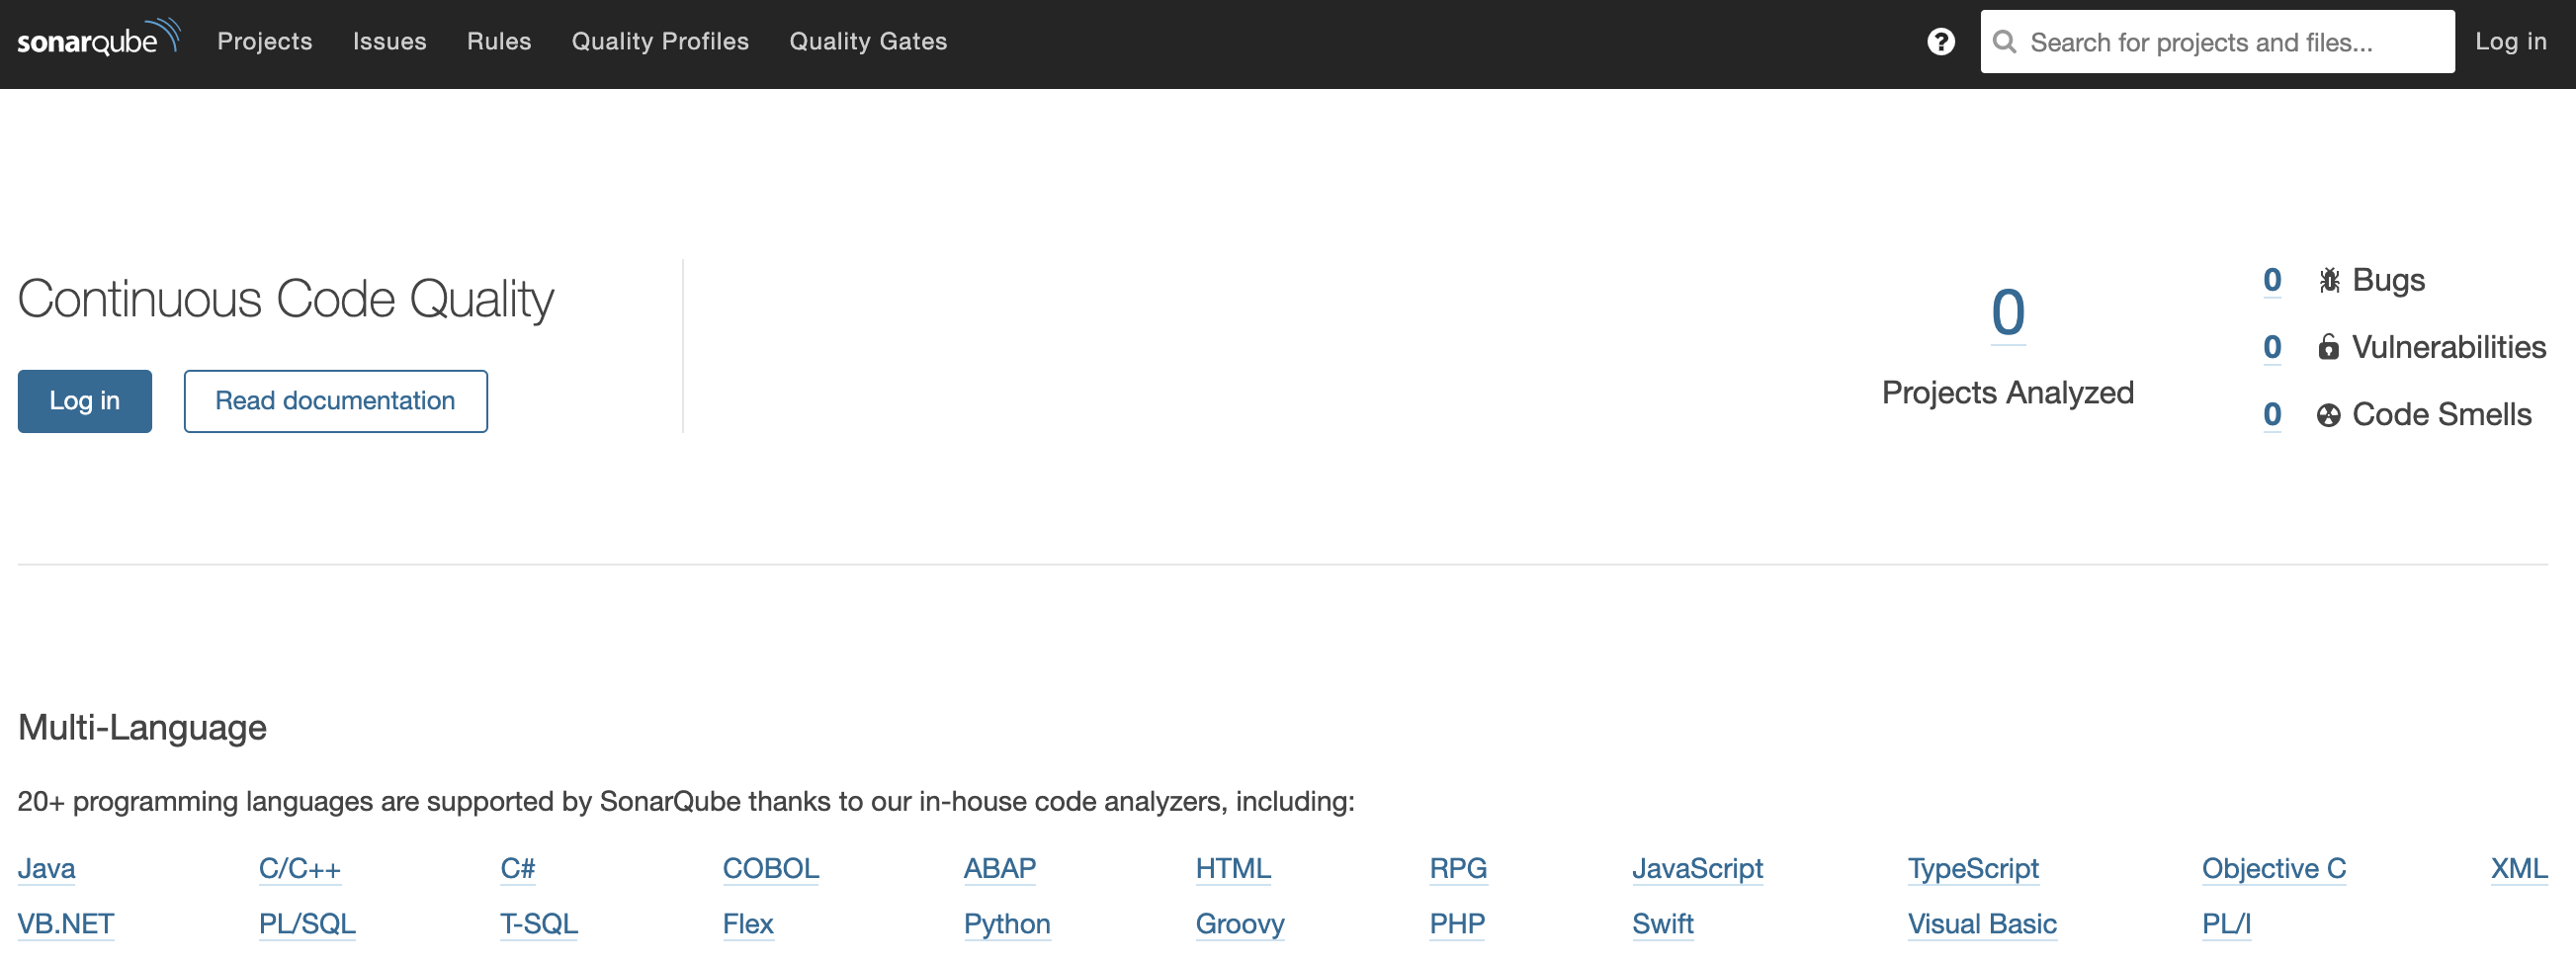
- 访问设置的SonarQube域名出现以下界面即部署成功
配置 Choerodon 认证
- 以下操作须将Choerodon搭建完成后再继续进行,若未搭建,请跳过。
添加Choerodon Client
- 记得修改
http://sonarqube.example.choerodon.io为实际的SonarQube地址
helm install c7n/mysql-client \--set env.MYSQL_HOST=c7n-mysql.c7n-system.svc \--set env.MYSQL_PORT=3306 \--set env.MYSQL_USER=root \--set env.MYSQL_PASS=password \--set env.SQL_SCRIPT="\INSERT INTO iam_service.oauth_client ( \name\,organization_id\,resource_ids\,secret\,scope\,\authorized_grant_types\,web_server_redirect_uri\,\access_token_validity\,refresh_token_validity\,\additional_information\,auto_approve\,object_version_number\,\created_by\,creation_date\,last_updated_by\,last_update_date)\VALUES('sonar'\,1\,'default'\,'secret'\,'default'\,\'password\,implicit\,client_credentials\,authorization_code\,refresh_token'\,\'http://sonarqube.example.choerodon.io/oauth2/callback/choerodon'\,3600\,3600\,'{}'\,'default'\,1\,0\,NOW()\,0\,NOW());" \--version 0.1.0 \--name gitlab-client \--namespace c7n-system
配置用户权限
默认管理员用户名:admin,密码:admin
- 使用管理员用户登录 SoanrQube
配置默认新建项目为
Private, 进入Administration->Projects->Management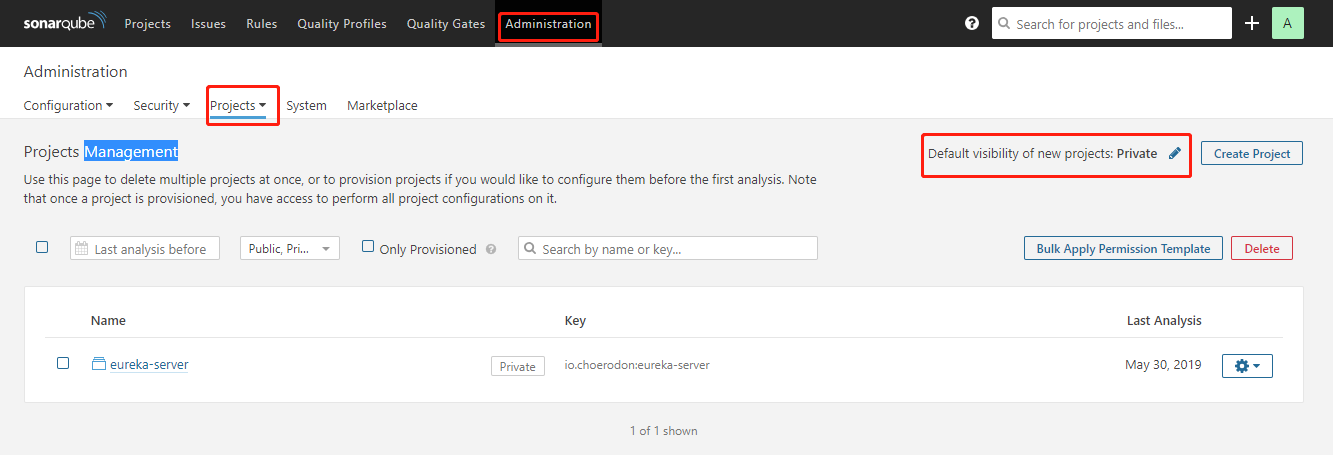
更改默认权限模板, 进入
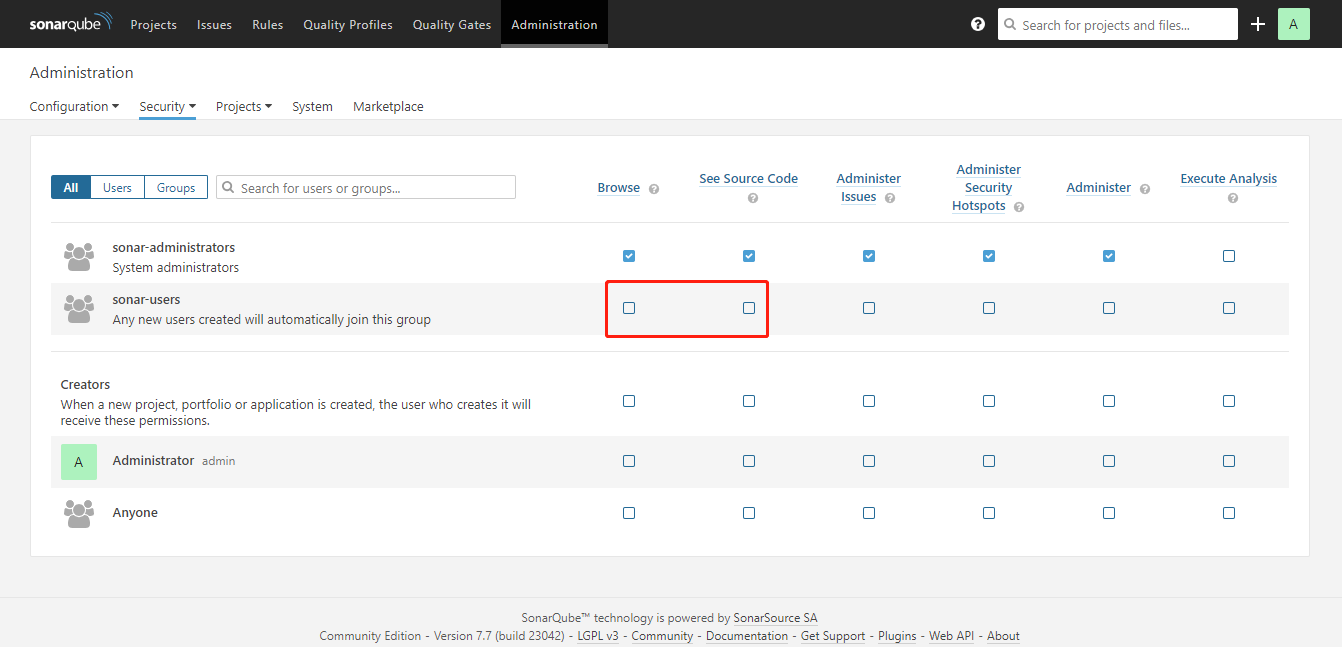
Administration->Security->Permission Templates,去掉sonar-users用户组所有权限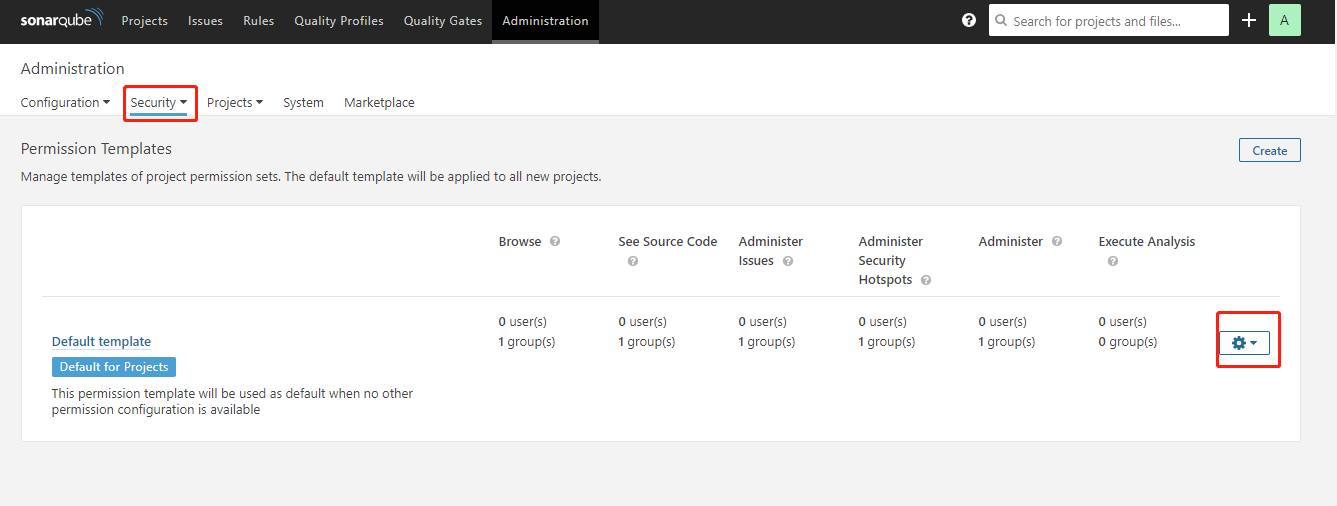
配置认证插件
- 使用管理员用户登录 SoanrQube
- 进入
Administration->Configuration->choerodon - 更改
Enabled为启用 - 更改
Choerodon url为当前使用的choerodon api getaway地址;默认地址为:http://api.example.choerodon.io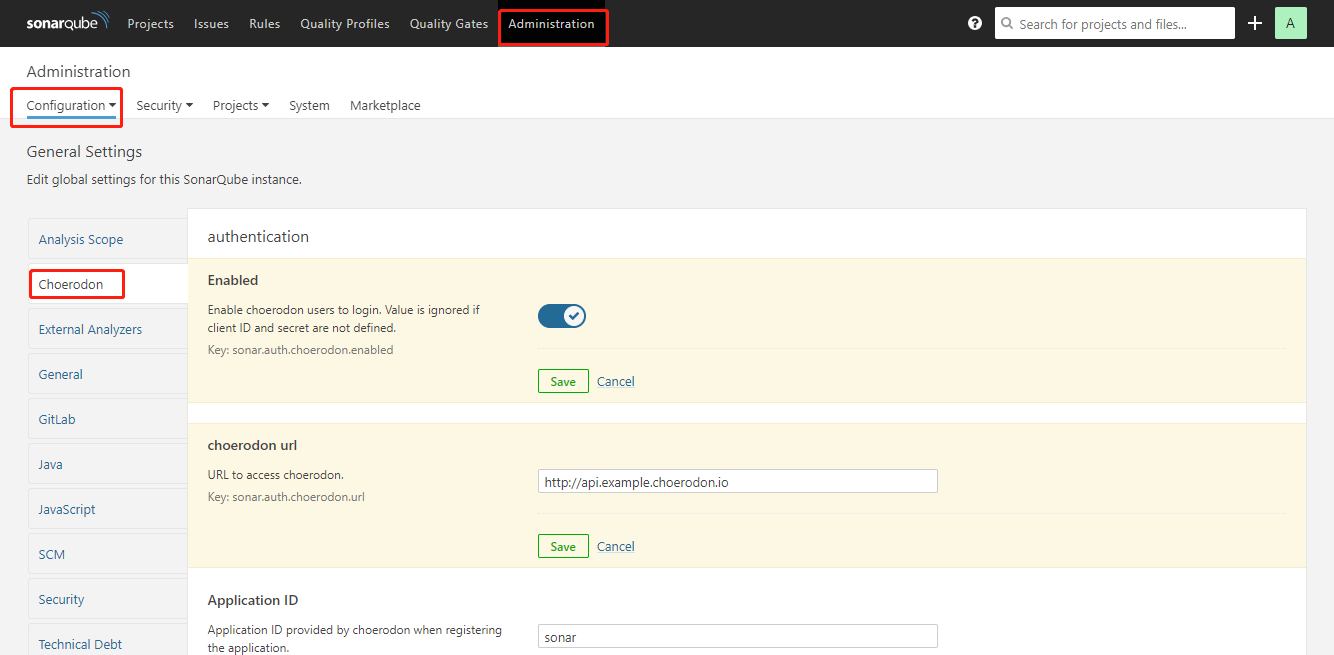
- 退出登录,测试使用choerodon登录,出现如下界面

